Today I want to look at other common mistakes. Let's jump right in...
4. Take note of the minimum distance!
Many pictures I see in blogs are blurry close-ups, accompanied by a note “Sorry for the blur; I don’t know how that happened…”. I can tell you how: You probably came too close to your subject! Automatic cameras will snap anything that you point your camera at. However, all cameras have a specific minimum distance between the lens and the object which the camera is shooting. Moving closer than the suggested minimum distance will result in blurry images.
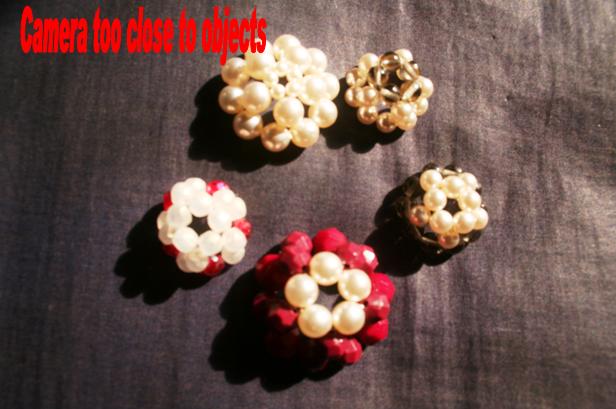

I am shooting with a Canon 350 digital SLR. On the lens it tells me the minimum distance I can shoot an object from: 0.28m/0.9ft. What it means is – if I am any closer than 28cm/9 inches to my subject, the lens will not be able to focus on it clearly and the image will come out blurred. Check your camera for the telltale note – or look up your manual to find out.
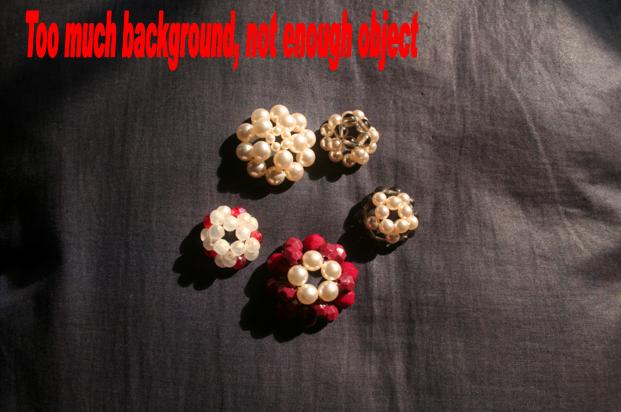
5. Frame the subject as big as you can!
If you followed my advice from number 4, you will end up with a focussed picture that has your object in the centre - but a lot of unnecessary background around it. And again I am not happy - frame closer! This tip came from the camera manual of my first “proper” automatic camera, a Pentax. The advice is priceless: Whatever you are photographing, whether it is an object or a group of things – try to get them as big in the frame as you can. That way your readers can see the object clearly and in detail. Alternatively… (read on to number 6).
6. Crop for best results!
Tip number 6 follows from tip 5: If you have taken a picture that has too much background showing, just crop it down closer to the object. For best effect, leave the same amount of space on opposite sides of the image.
Compare the next two images:

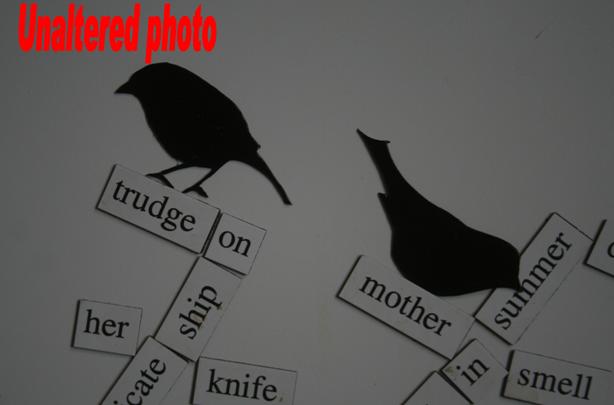
7. Minimal PS-Intervention is fine!
Let’s face it: We are crafters, not photographers. Your photo optimization should not take longer than the time it took to make your craft object. Bearing in mind that photos look pretty good on a computer screen even at low resolutions, there is not that much you need to do. For general purposes it is fine to use the “auto correct” button in MS Picture Manager or in online applications like Picnik. This will automatically set the exposure, colour and contrast on an assumed ideal level and usually takes out the dullness from pictures. I find that it is quicker to use auto correct in Picture Manager than to wait for Picnik to open up on Flickr. So I quickly auto correct my images on my laptop and then upload to the online album where I am hosting my images.
Here is an example where the auto correct chose a better white balance for my image:
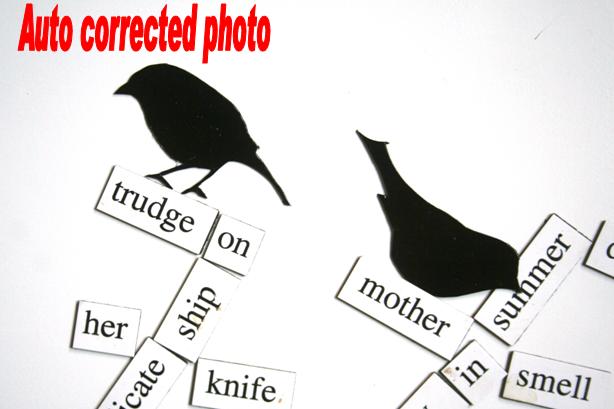
This was just done with one click on the auto correct button! Yes, I do know that the pros use Photoshop - but to reiterate: This is photo optimisation for amateurs and not for geeks.
And finally an appeal:
Less is More!Please don’t overload your post with pictures. Concentrate on a few good shots for illustration. Pick out the ones that show your object clearly and attractively. No need to show every single shot which you took during your 3-hour-shoot. – Your readers just get bored having to scroll down your post over shot next to identical shot next to identical shot next to... Either they just scroll without looking properly and will miss the really good shots. Or if worse comes to worst, they get frustrated and jump
Ok - sermon over! As you can see, I do not always adhere to my own rules. Of course I have pics on my blog which are washed out, badly composed, full of hard shadow or unnecessarily large background. You can't follow every photo rule religiously. But maybe my tips have made you more aware of the importance of good photography? Give the tips which you found interesting or helpful a shot - quite literally! I would love to hear about your experiences! And if you have any particular photo-related question, please drop me a comment or send me an e-mail.
Happy snapping, everyone!

2 comments:
oh man - all great tips! :) And thanks for clicking over to my blog too! if you'd like some great free (and very easy!) baby knits, you should totally join the site http://www.ravelry.com/ . It's free to join and it's a huge knitting community that links thousands and thousands of free patterns that are all totally searchable! I'm Nalamienea there too, so you can add me as a friend once you're there. ;)
-Sarah :)
Thanks again for posting a link to your blog over at dollarstorecrafts! :) As you can see from my comments, I've been reading over your blog. :) I am linking to this & your other photography post from http://croqzine.com
Post a Comment