FYI


Tuesday, March 30, 2010

Plastic Milkbottle Recycling


Yoohooooo, I am back. Even if only for a little break between another set of visitors. I was sad to see my last visitors go home, but I used the time to do a little crafts project. This had been sitting at the back of my mind for quite a while, and I am kinda happy with the outcome. - How many bottles of milk do you go through with your family? We drink about 2 litres per day - I find that quite a lot, actually... The milk comes in these translucent 2 litre-plastic bottles in Ireland. So go through seven of them per week. Of course we put them into the recycling waste, but I would much rather make something from them... And I finally came up with a nifty little idea.


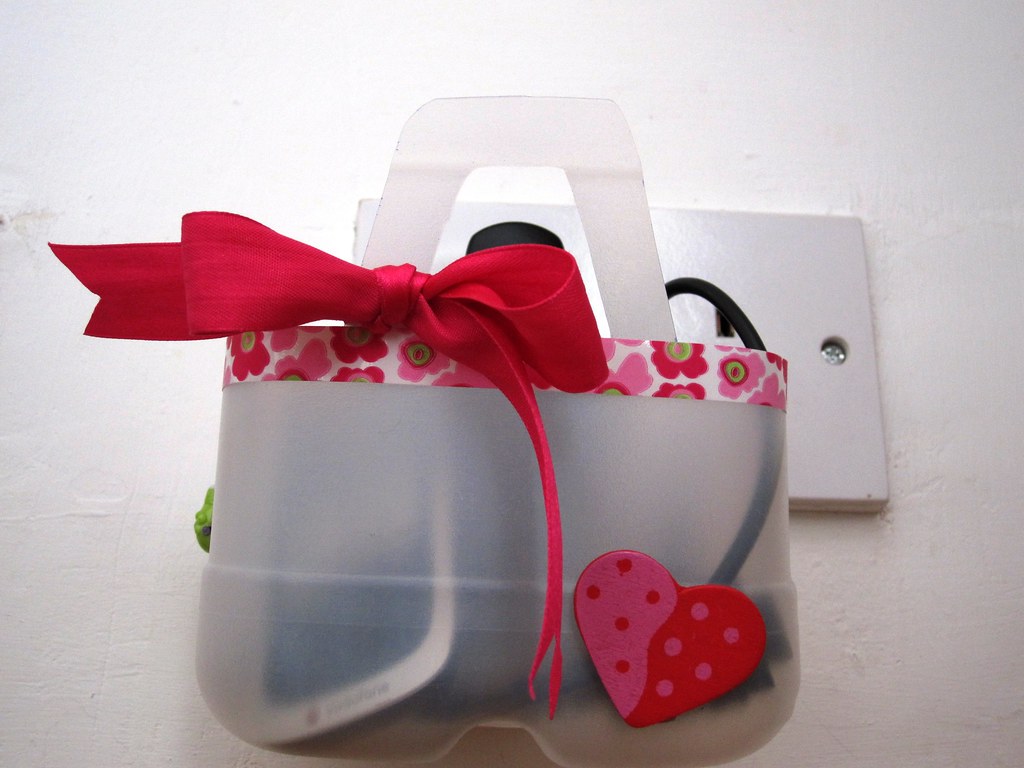
Can you see properly what I made? Yes, it is a plastic basket with little handles. But the cool thing is that the handle is big enough to put a plug through and attach it that way against the socket. So this is really a little mobile phone charging station. And here is how I made it:

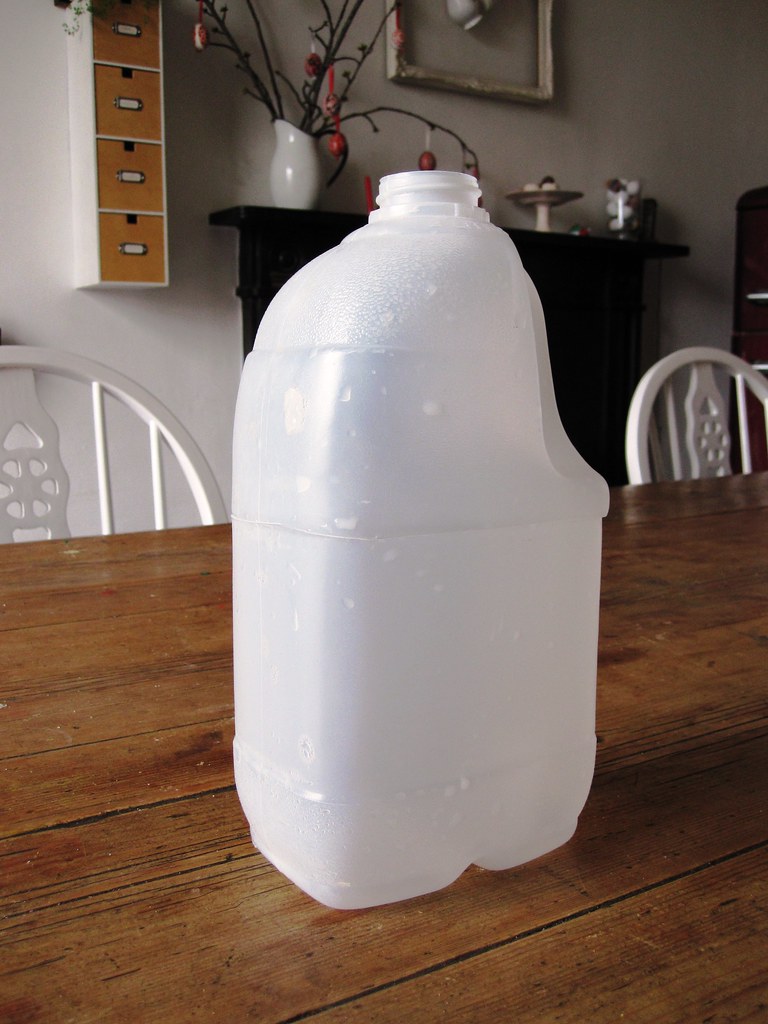
Take a plastic milk bottle - or other plastic container that is reasonable easy to cut with scissors. A bottle with a rectangular-shape bottom is easiest to use for this project. 

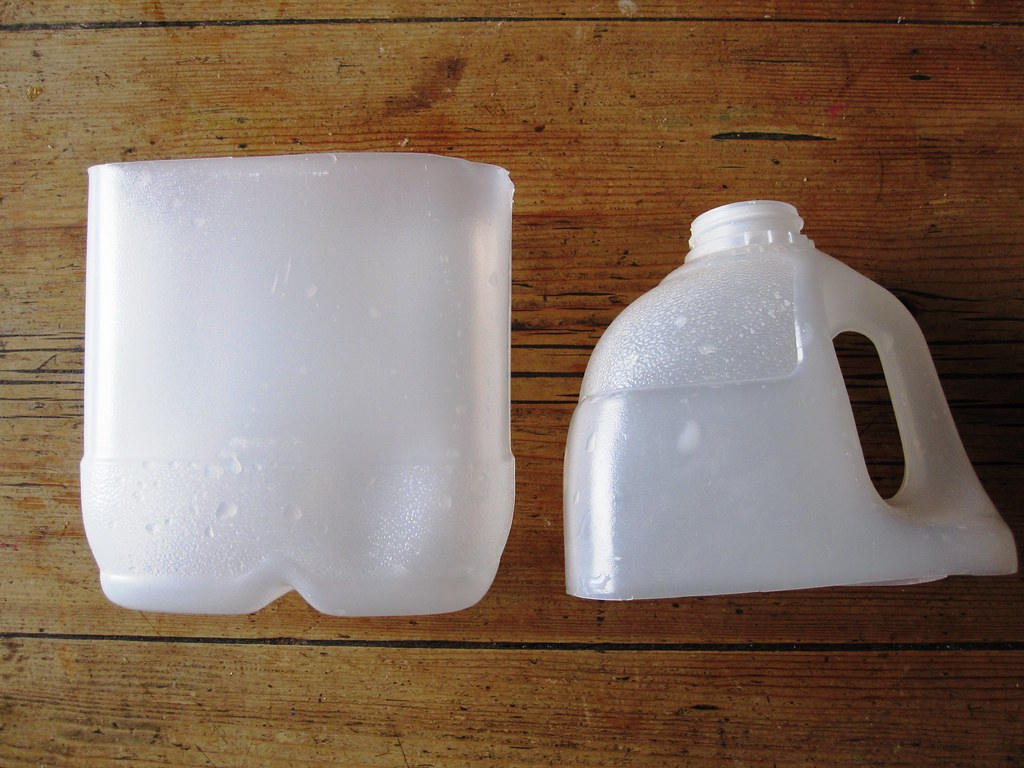
First cut the bottle in half. Make sure you have enough of the bottle left, though, to cut out little handles.

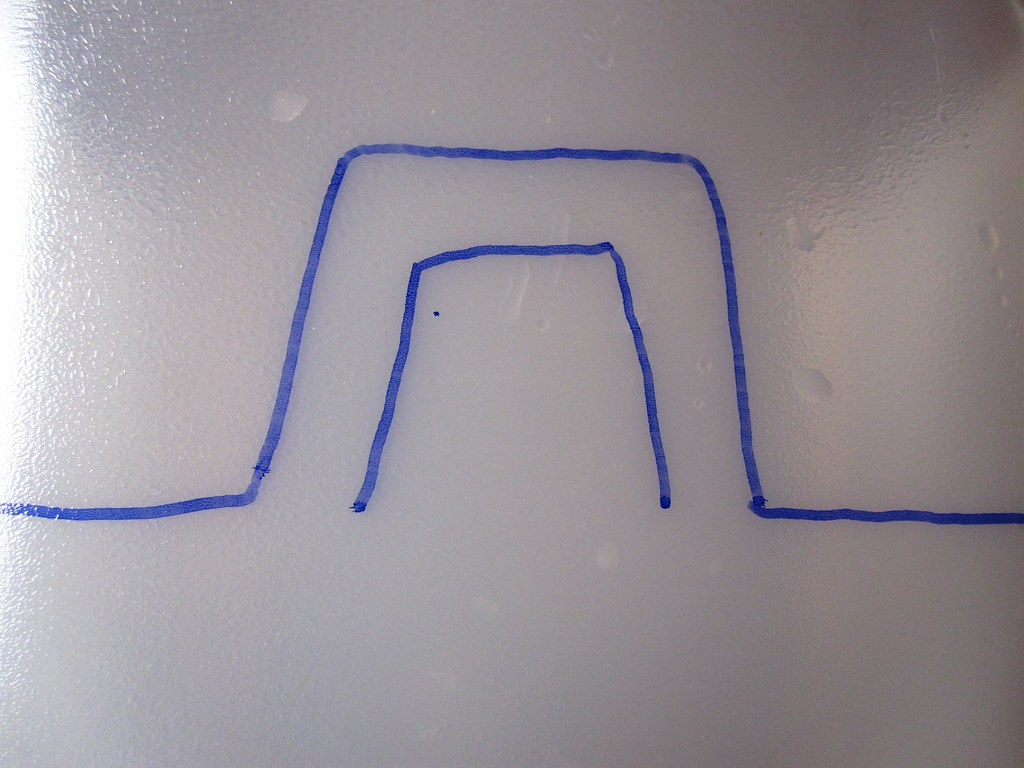
Next determine the size of your plug. The Irish plugs are really strange - hehe, I think so, having grown up with different types of plugs in Germany. They have three bits sticking out, arranged in a sort of triangular shape. Mark the shape of your handles on the plastic, either making a template or freehanding it. 

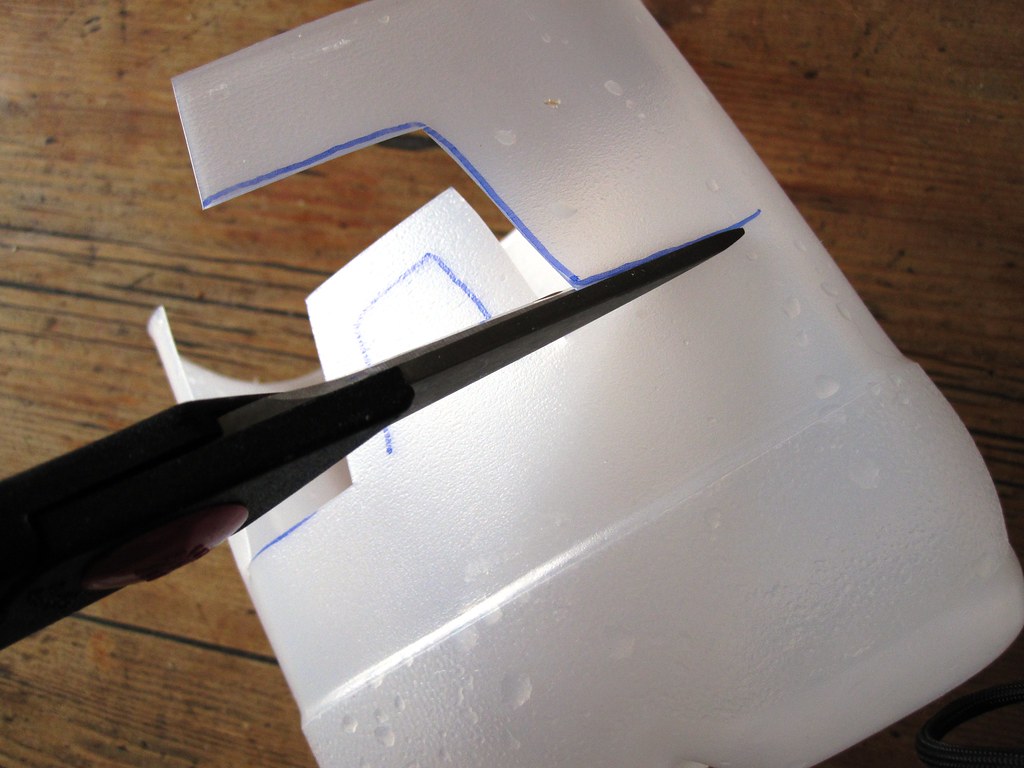
Now cut out the handles and the rim of the basket. Our bottles are fairly thin plastic, so it was very easy to do that with ordinary kitchen scissors.


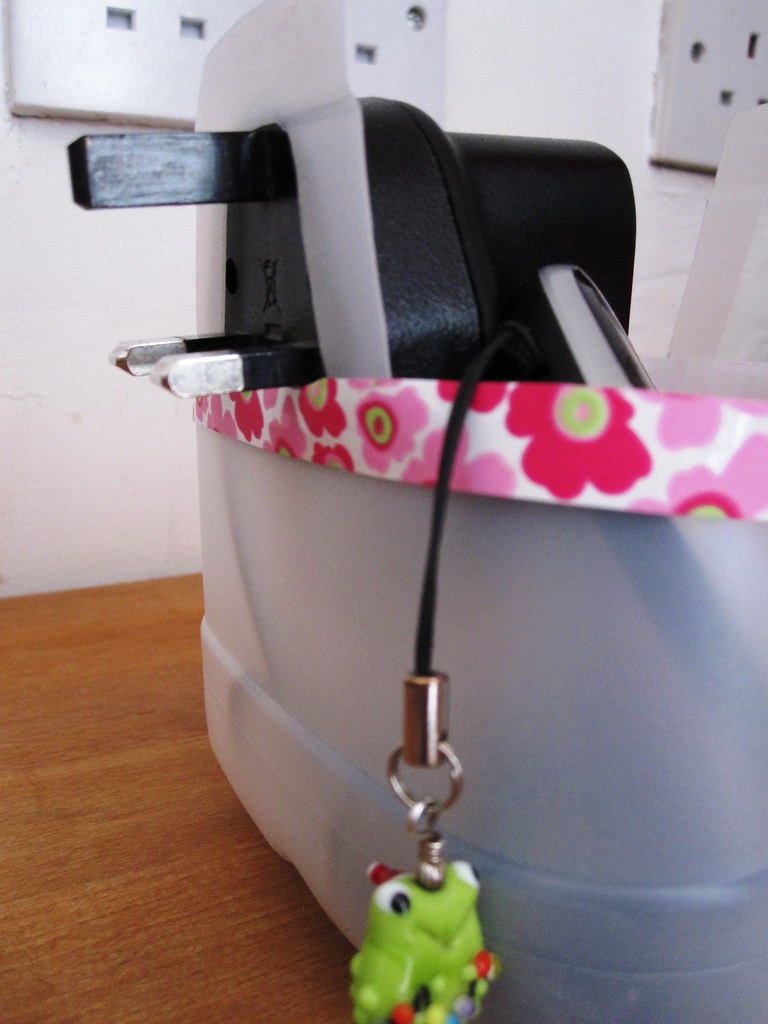
Bingo - that's it. You can now push the plug of your mobile phonecharger from the inside of the basket through the handle and plug it into the socket. The handle will keep the basket hanging securely against the wall/socket. Plastic is non-electroconductive, so it is safe to attach it that way. Place your mobile in the charging station, plugged into the charger.


I glammed up my simple charging station with a length of colourful plastic ribbon which I stuck around the rim with glue dots. A matching pink bow and a little heart complete the cute look. The whole thing cost nothing and was done in a few minutes. How much better can it get???

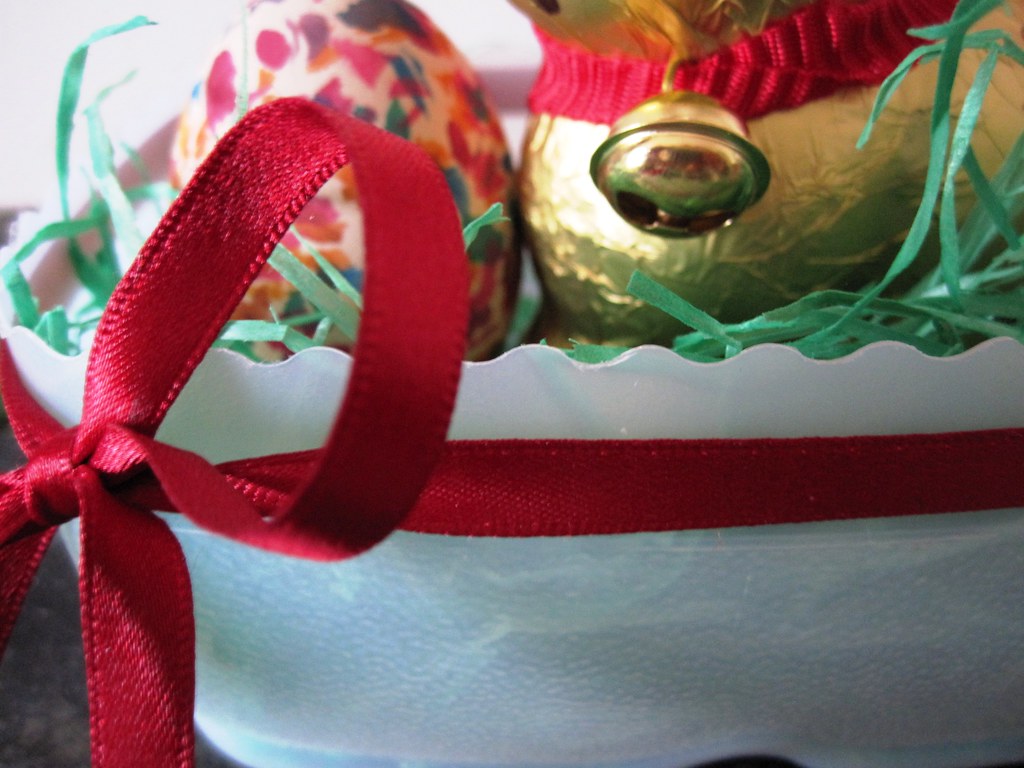
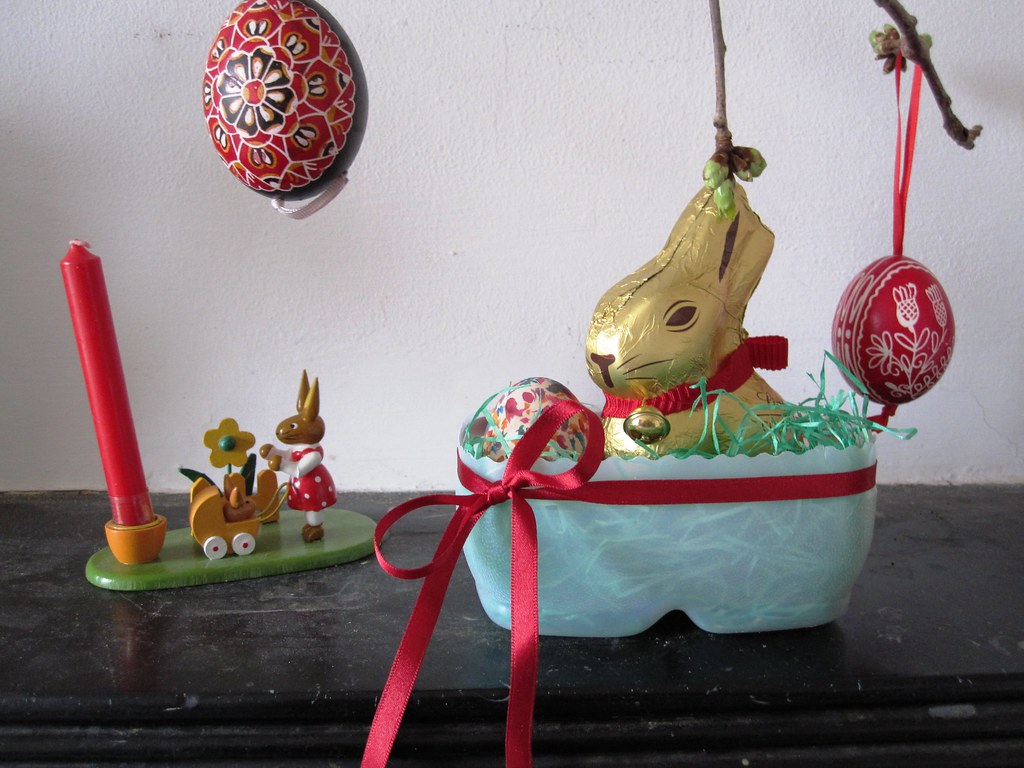
And while I was at it I made another one, trying out the wavy scissors. I just cut the bottle in half and then tied a little ribbon around it. With some Easter grass it is a cute little nest, home to a Lindt chocolate bunny which I am saving for when Lent is over and I am eating chocolate again. Can't wait...


Where do you keep your mobile phone? Have trouble finding it in the morning? Well, no more hunting for your mobile. Even when not charging it, this is a handy place to keep your phone! Make one for each member of the family, personalize the charging station with embellishments, initials, ribbons... Can you think of other uses for a milkbottle basket?

Best,

Linking to:
Photobucket


DIY Day @ ASPTL


Saturday, March 27, 2010

The Star on Saturday #3

Hello... I'll give it another try and see whether my link widget works this time.


As I did not craft anything this week, I can't link my own favourite post of the week. But what about you? Anything that stood out this week? I'd love it if you had something to share with all the other insatiable crafters out there...

Please link up below. And remember the rules:

  1. The project has to be yours. (But it doesn't matter whether it was posted on your blog or you posted it as a guest post somewhere else.)
  2. Only one link per week.
  3. You need to link back to the party via link or button.
  4. Anything vaguely crafty goes: Projects, re-dos, before and afters, recipes, how tos, also blogging tips.
  5. By taking part you agree to Craft-Werk using an image from your post to include in the "Feature" post on Sunday.


Best,


Friday, March 26, 2010

Apologies...

Another "oooops" from me - I am totally snowed under with college work and visitors at the mo. No time for crafting or for writing :-(. I hope I will have a little more time soon. In the meantime, I am resuscitating an old project that I posted in the early days of my blog. In fact, it was this project that initially made me think I should really start a blog and share my ideas with interested crafters. However, I didn't really have much of an audience back then, so I hope that some of you have not seen this project of mine before...


This is my designer lampshade. It has just been featured by The Frugal Designer Rayan on her fantastic website which contains a huge resource library for crafty projects, remodels, decorations, ideas and inspiration. Please pop over to her site and check it out for yourself. Submit your own projects and help build the library if you like. 

The lampshade is really easy to make - you only need some cardstock and staples to make it. It is assembled from 12 pieces which look like this:


I describe how to make these here. Don't get thrown off by the fact that they are meant to make a Christmas star *hehe*. The lampshades look really nice in my sitting room. See for yourself: 


(I can't tell you how much it bugs me that the lamp on the left was not sitting straight when I took the photo *ugh*.) Please check my original post.

Right, back to work and visitors... I hope I'll be able to schedule the blog linking party for tomorrow. AND that it works properly, this time...

Best,

Monday, March 22, 2010

Oooops...

Hello everyone, something went wrong with the link party on Saturday. Apparently the widget didn't quite work. :-( And worse - I didn't notice it because I was busy all weekend, photographing and looking after guests. 

Big apology to everyone who tried to link up. I hope I get this thing working next week! Off to visit all comments and new followers now. But do stay and have a scone, please - they are freshly baked ;-)


Best,

Friday, March 19, 2010

Second Star on Saturday

Did you write and craft much this last week? Well, I got two little projects done - and wish I could have done more. But alas - life doesn't always let me do what I want to do. I am pretty busy with my college course at the mo, and then there is also family duties and a string of visitors who are staying with us. 

A big thank you, by the way, to all the nice people who took the time to leave a comment on one of my posts. I do try and return the visit, but it's entirely possible that I sometimes miss someone. Ooops. Not intentional! I know how GREAT it is to receive feedback. ANY kind of feedback - even just a one-word-post like "cool" can make my day. 
How about making somebody else's day next? Do you have a favourite project that you posted on your blog this last week? I'd love to see it. Please do post it here on "The Star on Saturday" linking party. And then visit the other participants' sites and leave a comment for them.


The rules:

  1. The project has to be yours. (But it doesn't matter whether it was posted on your blog or you posted it as a guest post somewhere else.)
  2. Only one link per week.
  3. You need to link back to the party via link or button.
  4. Anything vaguely crafty goes: Projects, re-dos, before and afters, recipes, how tos, also blogging tips.
If I were to add a link, it would be my Easter Eggorations... they were my favourite post this week, because it was such an easy craft and yet turned out really nice. 

What is your favourite post of the week? Please link up!!!


Best,


Wednesday, March 17, 2010

Mod Podged Pendant

Ever since I started in blogland a few months ago, I kept hearing the magic words "modge podge" everywhere. Decoupage is probably a little bit too fiddly for an impatient crafter like me, but I was amazed by the versatility of Mod Podge (yes, I know how it is spelled correctly ;-)). Alas, it is an American product and I had never seen it anywhere in Europe. So no mod podging for Craft-Werk, it seemed :-(. But imagine my surprise when I came across a bottle of the magic stuff a few weeks ago in a Dublin craft store. I had to buy it - the funky psychedelic logo and colours drew me in, too... So it had been sitting around in my craft supplies for a while - and yesterday I finally found a way of trying it out. 


I mod podged a rather non-descript pendant into something colourful and cute. The pendant came with a neck hoop I had bought a while ago. I didn't like the metal teardrop - I just wanted the hoop to put my bead balls on it. At the same time, I hate waste, and so the teardrop pendant had to be used. Here we go:

For a change I had some genuine origami paper in my stash which was both red and cute.

I traced around the pendant.

Then I cut out the outline with my craft scissors. A smaller scissors would have done a better job, but I was impatient...

I applied a coat of Mod Podge to the pendant and placed the outline on it.

After letting it dry for 15 minutes I covered it with a top coat to seal.

Tada! That was it. I let it dry for a good while. To give it a bit more interest, I added a bead and this cute little silver heart to the neck hoop. 


Oh, I much like the outcome - a bit of spring feeling with the little flowers. Much needed, I can tell you! Can't wait to wear this with my favourite red outfit. And the mod podging was easy-peasy - I loved it. I wonder what I can mod podge next...

Best,


Linking to


Monday, March 15, 2010

Easy Easter Eggorations

Ooops, decorations I mean... I am already preoccupied with eggs, as you can see. I like to have a little seasonal mantlepiece arrangement in my sitting room. In Germany - as in most places - we would hang painted eggs on branches which are placed in a vase. I actually have a collection of beautiful Czech hand-painted Easter eggs which I have amassed over the years. But they are predominantly red and white - and therefore will get pride of place in my red-and-white kitchen. So something else had to be found for the sitting room mantle. As this our first Easter with the new sitting room I hadn't yet got any extra deco and was wrecking my brain what to use there. And then my daughter came home from school with a beautiful paper decoration that she had made there. Bingo - easy to copy and yet looking really intricate and lovely.


These are very simply made, just by cutting out the egg shape, cutting slits into it, and then folding over the resulting triangles. You don't even have to be particularly exact with the cutting and folding - it will always turn out nice. That's why this is actually a craft you could involve your kids in. Depending on their age you could do the cutting for them. The little ones could actually colour the paper for you and you would cut and fold. My daughter coloured, cut and folded a stack of them herself and we put a vase with twigs into her room, too. Everyone happy ;-).

But here is a little step-by-step tute. As I didn't have doublesided scrapbook paper at hand, I quickly printed out some nice designs from Canon Creative Park

Then I quickly made a template with two sizes of egg shapes in MS Word. I printed the template on top of the scrapbook paper. (I'll put the template at the end of the tute for you to download.) The lines are very thin so they don't stand out too much and distract from the finished design.

First of all I cut out all the egg shapes from the paper.

Fold one shape in half length-wise along the line. 

Cut along the short lines, creating lots of little slits in the paper. Make the cuts as long as suggested in the template.

You end up with a sort of leaf-design when you open the shape up again.

Now comes the folding. Start off with the smallest slit which is making a triangular shape. Fold it up to the top.

Leave the next slit untouched and instead fold up the one after that. Then push it under the bit of paper you left untouched. 

Again leave the next bit of paper untouched and fold up the one after and push it under. Continue to the end and you come up with this:


If you turn it over, it looks like this:


Finished! All that's left to do, is attach a bit of string to hang the decoration from. I also pushed a couple of beads in complimentary colours onto the string to give the decorations a tiny bit more weight.

And now hang on your branches.


You can play around with the folding and sliding under and make different patterns. No two of the decorations are the same. They look intricately woven and yet are just very simple affairs.

Right, here is the template for you to download. I hope it works for you - otherwise just use it as a base from which you create your own template.

Paper Easter Eggs                                                            


Happy Easter everyone!!

Best,


PS: This project was... oneprettything

Linking to


Get your craft on Thurs.


giveaways


The Girl Creative

 The DIY Show Off

Making